9610 Commonwealth Ave., Jacksonville, FL 32220
Interior Grinding for Repair Prep (12-23-24)
Dec 23, 2024
Biscuit's exterior is nearly ready for primer, save for a few spot requiring additional spot filler that I'll address later in the update. But today's task was all about the interior fiberglass repairs, and more specifically, preparing those areas that require new laminations to enclose access cutouts as well as cracks and more significant "dings" (to use surf parlance). I began by suiting up in a full-body Tyvek suit and a full-face respirator. I then grabbed the Makita 9031 1" belt sander, a sharpie, some sanding disks, the shop vac and a fan for the work ahead.
I started at the aft end of the v-berth, both the port and starboard vertical surfaces of the interior liner for this area of the cabin. In this place, one might see a portal-potty head, or even a proper mounted head, complete with intake seacock and discharge seacock. As Biscuit was delivered to the shop, this area did not retain any of the afore mentioned lavatory accoutrements, save for a seacock in the port locker. This seacock was removed a few weeks back, bevel ground on the hull, glassed in and faired prior to Biscuit's bottom job. The access cutouts made to either side of where a head might be mounted, or temporarily placed, was likely for hoses and is the target for repair in this area.
Using the Makita 9031, a narrow belt sander good for accessing tight spaces, I ground back the gelcoat and fiberglass to achieve a good substrate to then lay new fiberglass onto. The surface prep was made to both the exterior and interior of these surfaces. Fiberglass will be laid in the coming days, then filled and faired to make ready for primer. While I was at it, I sanded the surface of the recently enclosed thru-hull in preparation for some backing patches to be glassed in.
Next, I moved aft to the area directly beneath the bridge deck , where the cockpit scupper seacocks are mounted. Wanting to create a blank canvass to work from when installing new thru-hulls and seacocks for the cockpit drains, I glassed the old ones in. There may be slight movement in where the thru-hulls are mounted, but also the interior fiberglass liner was cracked in places, fairly severely. Repairs to the liner were required as part of the installation of new seacocks. So, to that end, I needed to grind back the gelcoat and glass in areas requiring repair. The severe cracks quickly turned into voids, and I am guessing here that the liner lamination schedule was laid up thinner in certain interior corners - you can see some symmetry in the location of voids for this "engine pan" area. The Makita 9031 was a great tool for this area, though at the expense of constant body contortions. The industrial-sized fan did a fairly good job at taking away the air-born fiberglass dust, though I had quite a bot to vacuum up at the conclusion of the day's grinding activities.
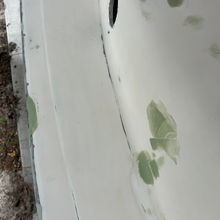
Over the next few days, I will template, cut and apply new fiberglass to these repairs areas. The final bit of work for the day was made to the exterior - those spots requiring some additional fairing filler. I used the Total Boat Total Fair again on the remaining voids / low-spots.
Total Hrs: 4


